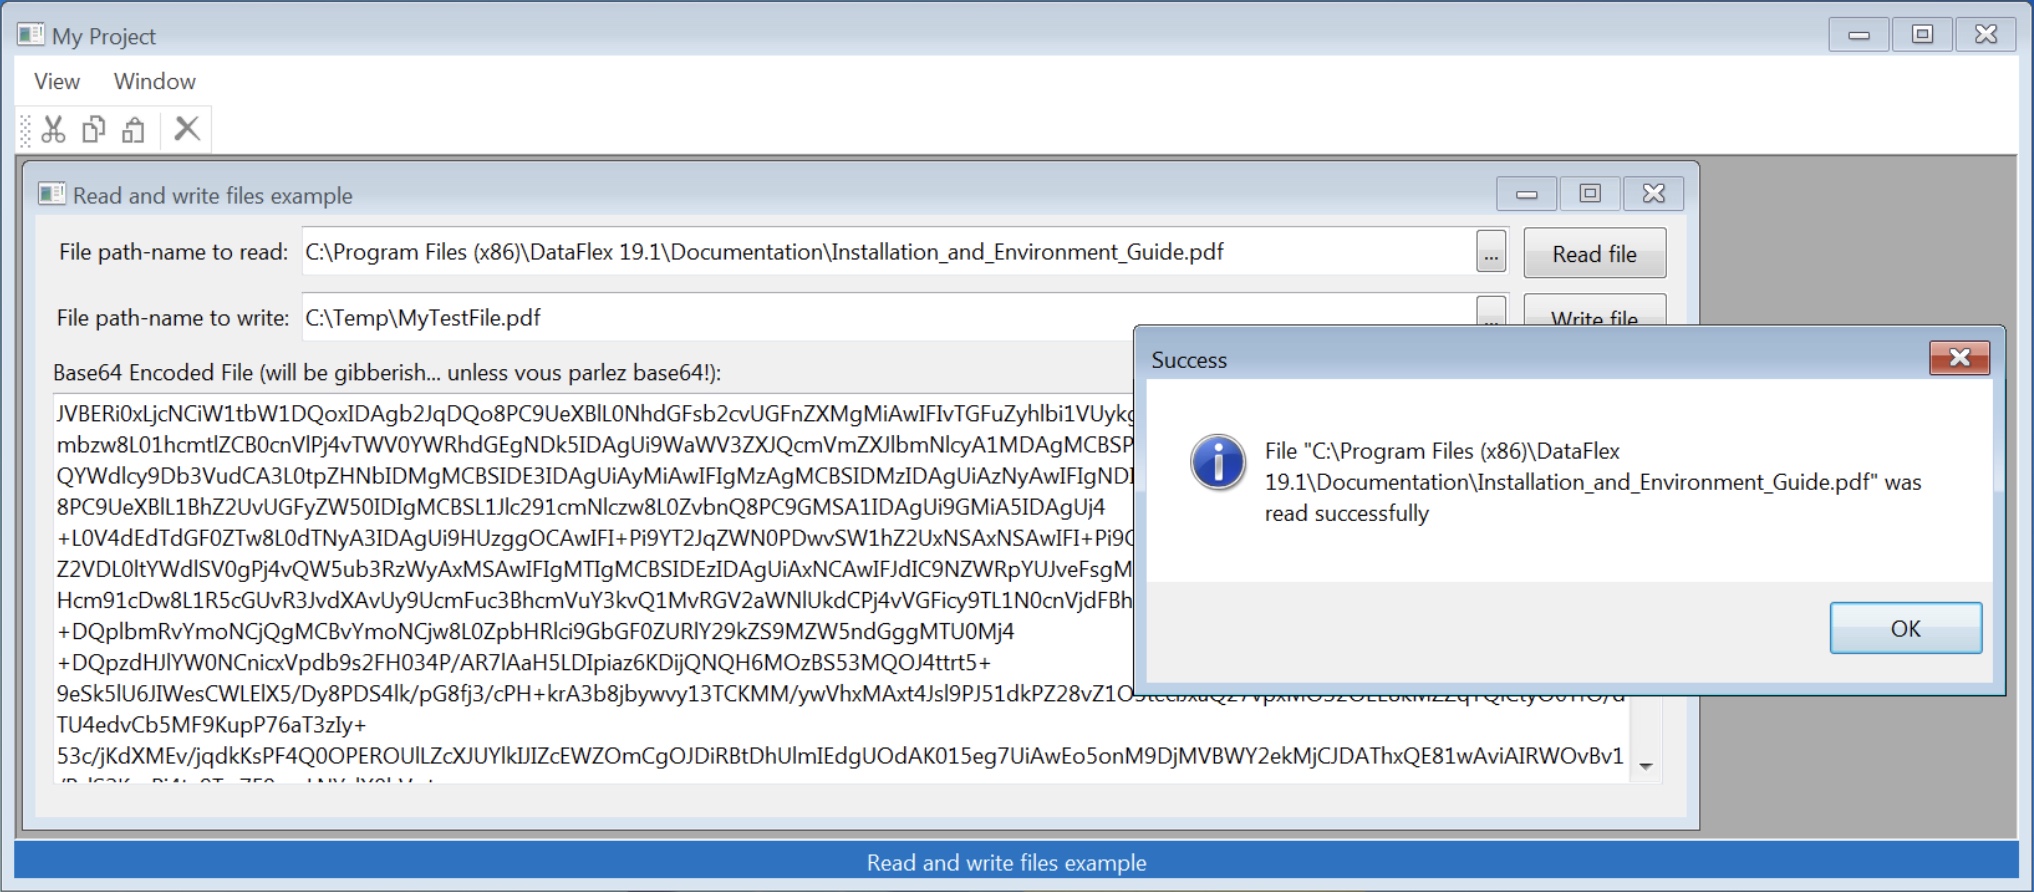
Recently the question ‘How to Convert pdf file to base64 string?’ was asked on the Data Access Support forums (thanks Todd! <g>). Working through the answer led me to produce the following little, free ‘binary file converter’ sample view to illustrate working with binary files in DataFlex (it just reads them in, stores them as a base64 string, then writes them back out again):

The Binary File Converter view
This view should be able to read and write any format of file (binary or otherwise). I tested it with the almost 30Mb MySQL 5.6 Reference Manual PDF (over 4,000 pages, forsooth!) – reading it in took around half a second, while writing it back out took between a tenth of a second and one second (it varied across tests). Pretty good, I thought – well done DataFlex! With smaller files the operations are virtually instantaneous (timing tests tended to return fewer than 20 milliseconds and frequently zero, on both read and write).
The main issues are that reading and writing arbitrary files requires an extra mechanism (the use of the “Binary:” file-mode on the Direct_Input and Direct_Output commands when reading and writing) and that storing files in DataFlex string variables and properties only really works some of the time, and depends on what you do with those.
If a binary file is involved, DataFlex can have a problem with the presence of nulls and other non-textual characters embedded in data stored in strings. So a more reliable mechanism is to use unsigned character arrays (UChar[] variables), which don’t care about any special meaning a given character might have in whatever context it is used, but just store it as a value in the range 0 to 255 (OK, technically 00000000 to 11111111), the same way it is stored on disk.
In order to safely store those characters in DataFlex strings, the whole file, once read in, is encoded using the base64 scheme. Base64 uses the 26 uppercase ASCII characters, the 26 lowercase characters, the 10 digits 0-9, and the “+” and “/” characters for a total of 64 – hence the name – to encode each group of 6 bits of the data in sequence (additionally the “=” character is used for padding the end the string to an exact multiple of 4 bytes, if it isn’t already), so any sequence of bits whatsoever can be transformed into something you could type on your keyboard – and more importantly can safely treat as plain text. Because of this – 6 bits taking up a byte, rather than the 8 bits of the original – base64 data uses roughly one third more storage space than the original.
That string is then decoded again when we want to, for instance – as in this sample – write it out again.
The cCharTranslate class provides functions – in this case Base64EncodeUCharArray and Base64DecodeUCharArray – to do these conversions.
Of course both of these mechainsms – UChar arrays and base64 encoded strings – mean that you cannot work with the content of that data very easily, but them’s the breaks – you pays your money and you takes your choice. Although in this case, this view is actually free to download and use.
What the Binary File Converter view does
Basically, aside from the user interface stuff and checking that the file to be read is actually there, etc., what the sample does is:
On reading a file:
- Opens the file to be read: Direct_Input channel iChn (“Binary:” + sFilePathName)
- Reads the whole file into an unsiged character array – UChar[]: Read_Block channel iChn ucaData -1
- Converts that to base64 using the Base64EncodeUCharArray method of a cCharTranslate object
- Moves that to a string: Move (UCharArrayToString(ucaData)) to sFile
- Stores the string in a property
On writing the file:
- Retrieves the stored string property into a UChar array: Move (StringToUCharArray(psMyFile(Self))) to ucaFile
- Converts that back from base64 using the Base64DecodeUCharArray of the cCharTranslate object
- Opens the destination for writing: Direct_Output channel iChn (“Binary:” + sFilePathName)
- Writes the UChar array out to that – simply: Write channel iChn ucaFile
Download the Free Binary File Converter view
You can download the zipped view from here, while the listing is on the Read and Write files example page on the DataFlex Wiki. By default it is set to read the “DataFlex 19.1 Installation and Environment Guide” PDF document (if you have installed DataFlex 19.1 in the default location) and write it out to C:\Temp\MyTestFile.pdf, where you can open it to see the results (which of course should be identical to the original!).
If this sample helps you with working with binary files in DataFlex, please leave a comment below.
Thank you very much!
You are very welcome!
Comments are closed.